Vintage, Paint and more...: organization
Showing posts with label organization. Show all posts

Sunday, February 7, 2016

Organizing with a French Hamper

Hi everyone.  
Are you all still trying to get your first of the year organization done like I am?  I have to say I am still on my quest to get a few things organized around here.  I have to admit I have not made a huge difference as I have been a bit under the weather.  I have a small project I put together to organize my out of control yarn supply  - a cute little French Hamper that I think you will enjoy.  I am also joining with the ladies of A Dose of DIY today.  This month's theme is, of course, organization. Just in time for me to get this little hamper off my to do list and into a functional state.


I found this rather drab old hamper at Good Will and picked it up thinking I could use it in some way.

using an old hamper to organize yarn

Not too pretty - woven raffia or reeds of some sort and dull.  It was quite dirty and needed a good cleaning also. So I set to work on cleaning it before I did any kind of rehab to it.

Thursday, January 14, 2016

Organizing Your Craft Room on a Budget

Good morning friends. 
 Can you believe January is flying by so quickly - here it is the 14th and I still have not started on the organizing I had planned this month.  We are still in holiday mode here as our grand kids are visiting this week. So I thought I would share some organizing tricks I have used in the past that I am still actually using. Organizing ways I have found that cost very little money, are easy to accomplish and make organizing your craft/work area easy. 


organizing your work/craft space on a budget

I don't know about you but if my work space is cluttered and in disarray I cannot concentrate and get anything accomplished.  I spend most of time searching for the exact item I need or just staring at the mess.  So over the years I have come up with a few very easy and budget friendly ways to corral that clutter and keep those most used items close at hand. 

using diy embellished tin cans to organize a craft space

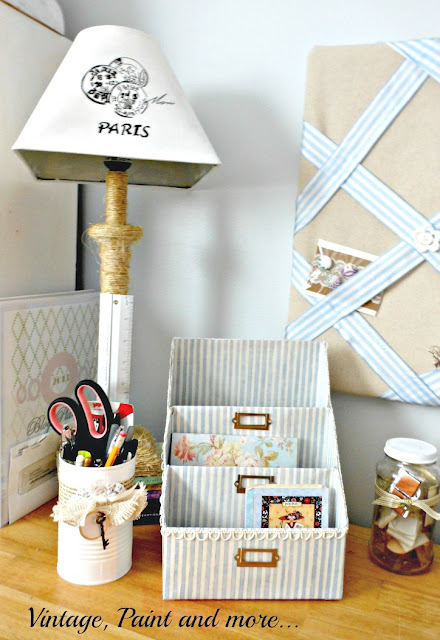
One of my favorite all time organizing items is a recycled tin can.  I have used them for all kinds of organization from pens to craft tools.  I love to embellish them and make them fit into my decor.  As you can see above I have painted these and used all sorts of vintage trims to make them "pretty" for the space.  You can find more on how to make these here.

diy embellished jar organization for a craft room

Another great storage item that you probably toss after use is the jar.  I love using these for those little items that get lost or you forget you have.  Having them in clear jars makes keeping them close at hand simple and always in your sight.  You can read about these that I embellished to fit into my vintage decor here.  


diy embellished hat boxes and cheese boxes for craft room organization on a budget

I also love to use unusual items to corral some of those odd shaped or overly large collections that I have accumulated over the years.  These hat boxes and cheese boxes house all my lace trims and specialty ribbons.  They hold an amazing amount of stuff and the best is they cost around one to two dollars each at thrift stores. You can read all about them here.


using thrifted kitchen canisters to organize ribbon on a budget

I am always on the look out for great items that can be used to organize some of my things when I am out thrift shopping.  These old kitchen canisters make the perfect ribbon storage when the ribbon is wound on clothespins.  You can read more on this here.


budget friendly diy paper organization made from cereal boxes

I think boxes have to be one of the most universal organizing tools around.  They are abundant and most are free.  This paper organizer sits on my desk and is used daily to house all my ongoing projects and ideas. I used cereal boxes to make it - can't get much more budget friendly than that.  You can read how to make yourself one here.

budget friendly diy box storage for organizing a craft room

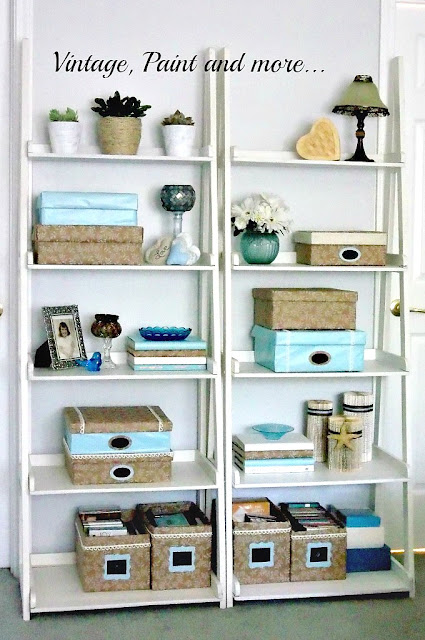
Another way I love to use boxes is to cover them with wrapping paper to match my decor. The ones I used above are old shoe boxes and cardboard boxes.  I used paper from the dollar store in coordinating prints and solids and then embellished them with vintage trims.  I also placed some labels on them. These house everything from books to faux flowers to scrapbook supplies.  You can read more about how to make these here.

using paper back books to diy business card organization for a craft room

How about old paper back books?  These can be folded to hold business cards, small notes, cards of buttons, or anything that fits between the folds.  Embellish it with vintage trims and you have a custom made addition to your desk.  You can read more about how to make your own here.

using thrifted and budget friendly multi purpose furniture to organize a craft room

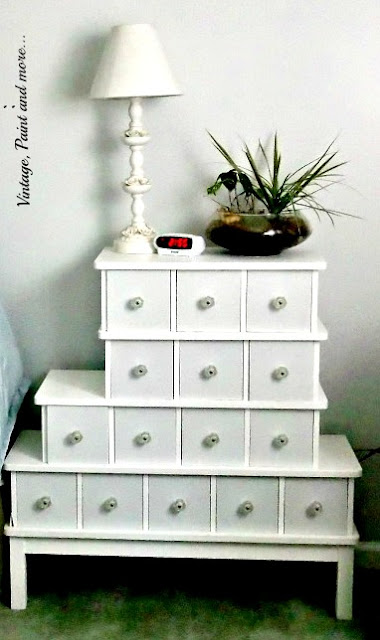
Another way to add to your organization is to purchase multi use furniture for your space. I have had this particular piece for a couple of decades - that just shows you how versatile it is.  The multiple little drawers house everything from glue sticks to ink pads to punches.  It can definitely hold a lot of scrapbooking supplies.  So be on the look out at thrift stores for pieces that you can use in many different ways.

organizing your craft room with recycled, thrifted or multipurpose items on a budget

This is my craft space.  Most of the furniture was either thrifted or purchased on a budget.  Then I painted everything to match so it has a cohesive look and fits into my vintage decor.  This is actually a corner of my bedroom as that is the space I love to work in.  But because it is organized, uncluttered and done to match the rest of the room it fits in quite well.  I love working here - it is my favorite space in our house.
Do you have a favorite budget friendly organizing tip you'd like to share with us. Tell us about it in the comments below.
Until next time enjoy creating something you love.


I will be linking up to the parties listed on the Where I Party page.  Please be sure to go by and check out all the great creativeness and inspiration found at each one.


If you like this post you may also like these.


                          Paper Dish Organizer

Wednesday, January 6, 2016

DIY Washi Tape Organizer

Hello friends. 
 Hope you all had a wonderful holiday and was able to spend lots of time with your families as I did. 
 January is upon us and like most of you my mind always turns to organization. I love starting a new year with a new slate and get all my "stuff" in some semblance of order.  Today I am going to show you a very simple little organizer that could possibly have multiple uses.


diy washi tape organizer from a wood medallion and a dowel rod


I have quite a few rolls of washi tape that get thrown here and there in bins, boxes and drawers - wherever I finish with them.  Then the next time I need some I am searching all over for them and can't seem to find the one I want.  Does anyone else have this problem? 
I needed something to corral all these little rolls in one spot and so I searched my house. A couple of years ago hubby had made me a stand for my cone trees that I never wound up using.  I came across it and inspiration struck.  What a great way to hold all that washi tape. So today I am going to show you how he made my Washi Tape Organizer.  It's a very simple little project that takes only minutes but I am telling you it definitely made a difference in my crafting.

wood dowel rod and wood medallion for diy washi tape organizer

You will need a 2 1/2" wooden medallion  and a 1/4 inch dowel rod 12" long. These can be found in most hardware stores and the medallion comes in different sizes.  You will also need a drill to drill the hole.

2 1/2" wood medallion used for washi tape organizer

First of all drill a 1/4" hole in the center of the medallion.  I have hubby do my drilling  - I am not a power tool girl. He also chiseled the tip of the dowel rod just a bit to make it easier to insert in the hole and fit tighter.

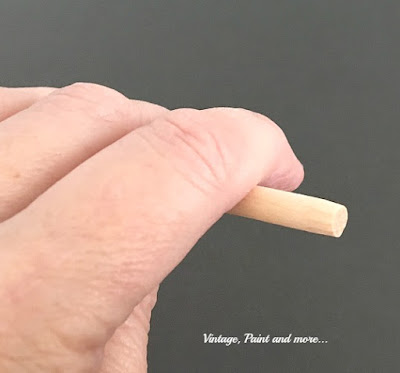
wood dowel for washi tape organizer

Next place the dowel rod in the hole.  You can glue it in place but mine is tight enough I didn't need to.  I also left mine natural but it can be painted or stained if you so choose.

diy washi tape organizer

This is how mine looked when finished.

washi tape on diy washi tape organizer

Add your washi tape and you are done.  An organizer in minutes that corrals those stray rolls in one place.  I also added some of my baker's twine rolls.  Since this is only a 2 1/2 " base it takes up very little real estate on my desk top and is right there for me to use when I am crafting, scrapbooking or journaling.  So easy to use also - I don't even have to take the roll off to cut the tape. 

diy washi tape organizer and tin can pencil holder

Here it is with one of my tin can organizers.

I am joining the ladies of Junk Visionaries today.  This months challenge is organization.  Check out the links below and see what everyone came up with to get better organized this year. There are some great ideas found there that I will be using to get my "stuff" organized. How about you?


Remember to join us next month when we meet the challenge of making something related to"hearts or Valentine's day from junk.  I can't wait to see what eveyone comes up with.

What is the most unique organization item you have used?  I love to hear from you so tell me about it in the comments below.  

Until next time enjoy creating something you love.


Tuesday, September 8, 2015

Junk Revision Challenge - Desktop Organizers


Hi everyone.
It's the first Monday of the month and that means it's time for me to join with several other bloggers in the Junk Revision Challenge.  What is that you ask?  Well, let me tell you about it.


Vintage Paint and more... Junk Revision Challenge

 Each month we are given a theme to work with.  Then we try to find an item  to salvage from the trash or a thrift store  and we re-purpose it to fit that theme. On the first Monday of each month each of us will share our item in the Junk Revision Challenge post on each of our blogs.  This month's challenge was "desktop/office idea".  I decided to make some organizational items for "Sissy's" desk.  If you follow me you know that I have been doing a series DIY Dorm Decor in which I have been DIYing a few items for "Sissy" to use in her new dorm room to give it a bit of a homey feel. 

Wednesday, August 19, 2015

Dorm Room Decor - DIY Dish Organizer

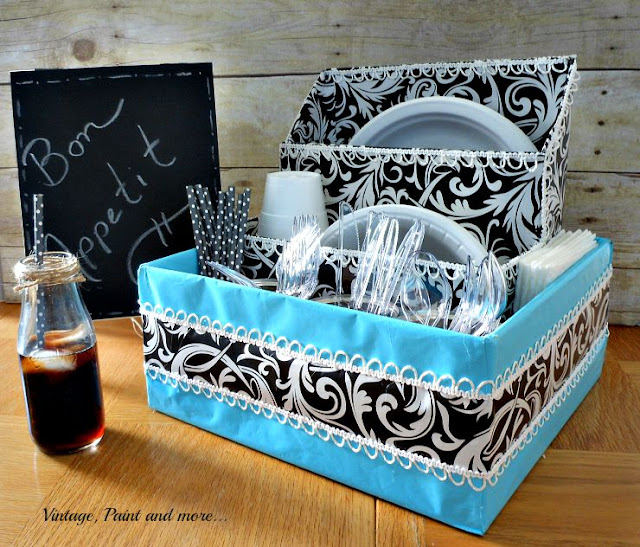
Hi everyone.  Today I am sharing another project I made for "Sissy's" dorm room.  This is more for organization than it is for decor but I still dressed it up a bit in her blue and black theme to make it more fun.  This is what I call a dish organizer - something to make things a bit easier for her.  It contains paper plates, bowls, cups, plastic eating utensils, napkins and straws to make it easier for her to have snacks and quick meals in the dorm. Everything she needs is right in one place.


Vintage, Paint and more... Dish organizer made from empty boxes and wrapping paper

Tuesday, July 7, 2015

DIY Multipurpose Cabinet


Good morning everyone.
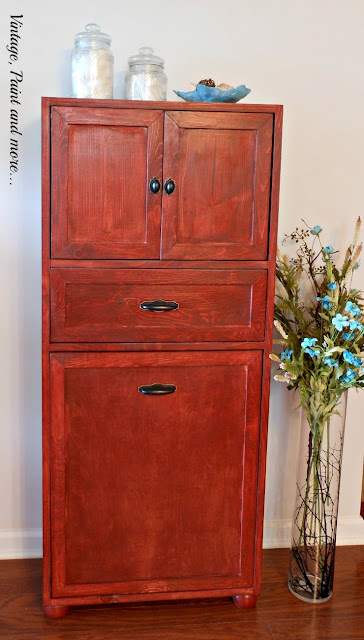
 Today I want to share with you a project that "T" has been working on for a few weeks.  He was commissioned to make a cabinet for a friend of his and in his "spare" time has been working on it.  I call it a multipurpose cabinet because I can think of so many uses for it however, she is going to be using it in her bathroom.  


Vintage, Paint and more... DIY multipurpose cabinet

I forget to go to the garage when he is working and take pictures of the process but I have a few you can see.

Vintage, Paint and more... collage of building stages of DIY multipurpose cabinet

Top left: the finished  cabinet before staining.
Top right: the beginning box structure.
Bottom left: the finished drawer construction.
Bottom right: the two drawers finished.

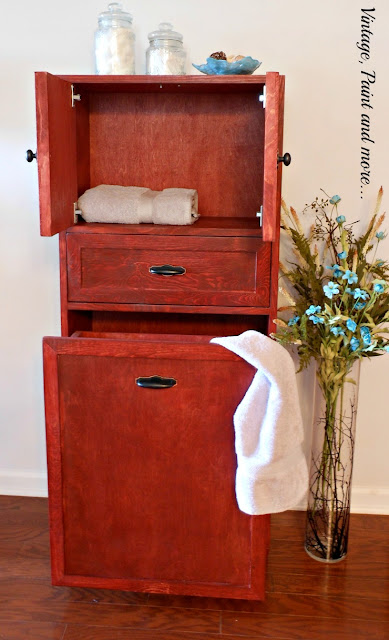
Vintage, Paint and more... DIY multipurpose cabinet

This is the finished cabinet.  I am not too fond of the color that she chose to stain it - Minwax Sedona Red.  It is way too red for me however it does match the woods in her home and she is quite pleased with it.

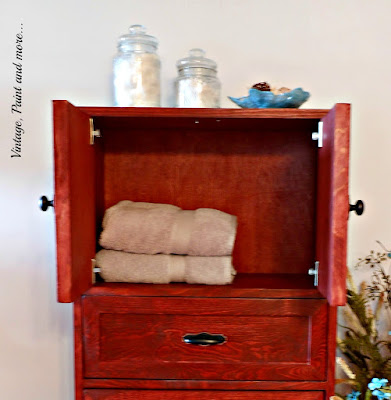
Vintage, Paint and more... shelf area of DIY multipurpose cabinet

She is using it in her bathroom for storage. This is the top cabinet area open that is large enough to store several towels or whatever she chooses.

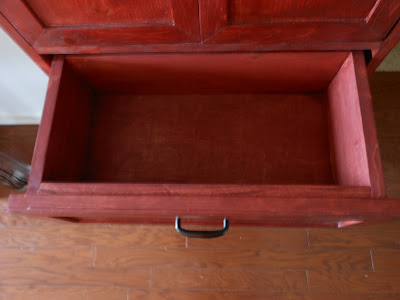
Vintage, Paint and more... small drawer of DIY multipurpose cabinet

Second is the smaller drawer that is a good size to store quite a few items.

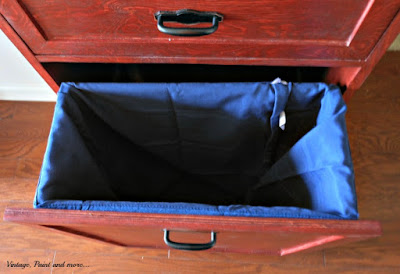
Vintage, Paint and more... hamper area of DIY multipurpose cabinet

Then is the part I love - a clothes hamper including a bag.  I love this idea for a bathroom or a bedroom.  But you could use it for all sorts of storage - your imagination could go wild with this piece.  Needless to say I think we will be getting one of these at our house or two or three...

Vintage, Paint and more... hardware on multipurpose cabinet

This is a closeup of the hardware - he picked a black with a bronze trim around it to set them off a bit.

IVintage, Paint and more... inside of DIY multipurpose cabinet

So much space in one little cabinet - so many uses.  I love it.
 Now that "T" has finished this project he wants to finish a couple of others that were put on hold. With the cooler temps here Papa and I have been painting the living and dining rooms and I will be sharing that with you soon, along with a few other additions to that area of the house. Can't wait to get to that point.
On an added note - this weekend was quite exciting for our family as "T's" daughter - our granddaughter became engaged. He proposed to her right after he graduated from the Marine Basic Camp - right in the parking lot!
Needless to say she was quite surprised as were all of us.  The wedding is not for quite a while as she has to finish college and he has to finish his training.  But we are looking forward to lots of wedding planning in the future.


What have you been up to this summer?  Are you just taking some time off or have you been busy getting some projects out of the way or have you had some exciting news also?  I love to hear from you so tell me about it in the comments below.

Until next time have fun creating something you love.

I will be sharing with the parties listed on the Where I Party page. Please go by and visit them - I am sure you will find some great creativeness and inspiration there.

Tuesday, February 24, 2015

Unique Little Table


a small side table with built in electrical outlets and USB ports


Like most of you we are a family with many technological devices.  We have computers, I-pads, notepads, kindles, cell phones, etc - you know. With all these devices there is a problem of charging them in a dedicated spot.  I have tried charging stations but they get in the way and a lot of times I find these devices just plugged in wherever the owner happened to be and there was an electrical socket handy. One day I found a cell phone dangling from a socket in the dining room - really?

Tuesday, January 27, 2015

Hometalk - DIY Paper Organizer Board

Last summer I made a paper organizer from some cereal boxes I recycled and a bit of scrapbook paper I had on hand.  I loved this project and so did all of you because it has been quite a popular project.  I posted it to hometalk.com . Liz from hometalk saw it and asked me to put together a board on paper organizers.  I was so thrilled to do it because I still have a lot of papers that could use some corralling. 

Vintage, Paint and more... diy paper organizer made from recycled cereal boxes and scrapbook paper

Wednesday, January 7, 2015

Organize Your Desktop on a Budget


Vintage, Paint and more... organization made from recycled items

Good afternoon everyone.  How is your Christmas clean-up going?  I finally got the last of the decor taken down and put away today.  This is later than usual for me and I know that I will most definitely find one lone straggler that is hiding from me later. Does that happen to you?
With the Christmas purge I always feel like I need to organize those areas of my life and home that are just not performing like I think they should.  I know most of you do the same thing.  So I thought I would bring together some of the organizational tools I have used to get my work area to function better for me. Not only do these do a great job of organizing my desktop - they are also budget friendly and actually can be free if you utilize things you have lying around the house.

Tuesday, August 12, 2014

DIY Paper Organizer

Vintage, Paint and more... paper organizer made from cereal boxes and scrapbook paper


I was in definite need of a paper organizer for my desk.  I am constantly putting papers that need to be attended to in small little piles all over my desk - thus they get in the way.  When I went in search of one they were so expensive I decided I could live life without a paper organizer or find a way to make one myself.  Then one morning Miss A left an empty cereal box on the kitchen counter for me and the wheels in my head started turning.  

Tuesday, June 17, 2014

Organizing With Jars


Good morning everyone...
I would imagine all of you are in the midst of your summer activities by now...
We are definitely on a summer schedule here - 
sleeping in late, no real meal schedules, lots of pool and beach time.....
and
lots of activities.
This week little Miss A went off to her first ever week of camp.

Vintage, Paint and more... Miss A going off to camp

As you can see, she was all smiles and quite excited...
we were the ones having the qualms and sniffles.
Thank goodness it's only a week 
I remember my days at camp as a child 
and
  I am sure she will have all kinds of stories to tell us when she does get back.
Can't wait to hear them.

So, on to today's project....

Thursday, May 22, 2014

Creative Storage Solutions


Vintage, Paint and more... DIY decorative storage, decorative boxes, box storage


After recently moving Miss A's room to the loft 
that had contained 
the Craft Room; it became necessary to find storage space
for all those craft items.

Tuesday, April 15, 2014

Monday, March 31, 2014

Craft Tool Organization

Written by: Cathy Carroll


I don't know about you but, when I am working on a project 
I have to run all over the house searching through drawers, closets, boxes, etc.
to find my craft tools I use.
I finally decided it was time to organize these "go-to" craft tools in one place
so I didn't get so frustrated trying to gather them together.
So, I put together a craft tool organizer to help me 
with this little problem.

Sunday, January 12, 2014

Weekly Routines and Goals


January - a new year, a new slate, a new beginning, a chance to start afresh.Like many of you this is how I feel and my thoughts go to making things fresh and new again. I try to come up with ways to make my life less cluttered, more simplified and yes, easier for me to navigate.  So, every year I try to come up with new ideas to make this come to be.  I lean toward organizing everything in my life but, alas, again like many of you it doesn't take long for me to fall back into the old way of doing things.  And, my life gets recluttered, more complicated and harder to deal with because of the clutter. But, this year is going to be different (how many times have you told yourself that? )  I have found a new way of doing things and it is working for me.  I have been using it for almost 6 months now and am ready to start using this method for all the areas of my life because it actually works for me.

How many of you have heard of the FlyLady?


 FlyLady cartoon    

She entered my life about 6 months ago  when my sister introduced her to me and I have to say my life has not been the same. Oh how she has changed the way I do things now.  My house is so much easier to keep up now and for the most part is company ready if someone decides to just drop in.  I don't have to worry that there is a sink overflowing with dishes, or that the bedroom door is shut because the bed is not made or that the bathroom is yucky with toothpaste splatters and less than presentable facilities.  This really does not happen anymore because she has taught me how to address these each morning in a very short time leaving me the rest of the day to do as I please with my time.  I. Love. It.  FlyLady is my heroine.

Computer, calendar, pen and coffee

FlyLady teaches you how to set routines to follow each morning and evening to keep the clutter at bay and under some semblance of control.  She teaches you how to declutter each room and area with baby steps doing each task in 15 minute increments.  It is totally amazing how much I can accomplish in 15 minutes.  I was totally blown away when I addressed a very messy desk.  I set my timer for 15 minutes and was absolutely stunned that I had time left over to do a drawer also.  But, oh my the feeling of elation after that mess was under control and I had a nice neat desk to go to.  Now, I just make sure I put everything away each day and that desk remains clutter free.  I. Love. It.

Now, each Sunday I write down my goals and routines to follow for the coming week.   This way I have my much needed to do list so I can cross off each task and visually see what I have accomplished.  I may or may not accomplish all my goals; as I tend to over load myself at times but, one thing for sure I am making headway on that very long to do list.  And, no matter how much or how little I accomplish my family is blessed with a home that is cleaner and less cluttered than it was last week.  

If you are having trouble keeping up with your home, as I was; problems with clutter and being embarrassed by what others may see if they visit you may want to stop by here each Sunday.  I am going to be sharing more about my goals - what I hope to accomplish and what I have accomplished, and some routines that I use to keep my home fairly clutter free.  Now understand, my home is not perfect but, it is comfortable for us to live in and presentable should someone stop in unexpectedly.  We don't have to move papers to sit on the couch anymore, or kick shoes out of the pathway to walk, or wash a cup to have some coffee - you know the drill...And, I have the FlyLady's routines to thank for that.

I will list my goals for each week and tell you what area I am working in.  I will also explain some of my routines as I do them but, I encourage you to visit FlyLady and read all she has there - it is amazing what she has done to help so many ladies get free of all the clutter that has built up in their lives.

This week's goals are:

I am working in the kitchen - trying to finish it up to move on to another area.  In November we painted it but, with the holidays I was stalled and nothing else was done.  I am cleaning, organizing and making some art for the walls.

House:
1.  Clean the ceiling light
2.  Clean the microwave, glass stove top and oven
3. De lime the coffee pot
4.  Make an organized communication center to keep us on point here.
5. Some art work for the walls
This past week I was able to organize the pantry and clean out the refrigerator. I also took down the Christmas tree ( finally) and all the Christmas decorations.  Did a Valentine mantel that I will be posting later and a Valentine wreath.  Unpacked all the suitcases and put away everything.  Then I did 16 loads of laundry that had accumulated - some family members stayed home and couldn't find the washer - hmmmm. Cleaned out all the candy and cookies, etc from the holidays... donated to the grand kids....

Blog Plans
1. Start working on scheduling all social media posts and comments - social media is my downfall.
            My presence is almost nonexistent so I am going to work on scheduling my comments and
            see if it helps me a little
2.  Organize Linky Party lists - there are so many.  There are new ones and ones that no longer 
            exist - I want to update them and get them so I can use them more easily
3.  Start posting three times per week
This past week I have written several posts and put them in draft form at this time.  I also joined HootSuite to start my social media scheduling and read quite a bit about social media scheduling tips.  I updated myself on the new Facebook "antics" and found LikeAlyzer to analyze my Facebook posts.  Found some very interesting things there.  Made some of my blog plans and goals for the year.  Read a lot and then read some more - so much to learn about this blogging stuff.  But, still feel like I don't know anything at times.  I also played with a new design site called Canva that is still in beta form but is really fantastic.  My granddaughter did the illustrations for a children's book for her creative writing class on this program.  Very simple to use and so much fun.

Personal
I am working on making a healthier lifestyle for me and my family this year. So I am going to list my goals for this area each week as it may help some others that are on the same path.
1.  Drink more water- you should half your weight and drink that amount in ounces each day.
2. Start core strengthening exercises. -  these are exercises given to my by my chiropractor; you can use 
             your own from strength training to stretching but just moving is the most important aspect of this.
3.  Add two vegetable to dinner each evening.  We are mainly a carb eating family and this is going to be a 
             biggie for us but, I am determined to start eating more veggies to displace so many carbs.
4.  Start reading "The Love Revolution" by Joyce Meyer
This past week I  read the book "Only Believe" by Danny and Diane McDaniels - the story of their beginnings with Advocare. Quite an interesting read proving that if you have a dream and pursue it with all you have you will eventually see it come to be.

Misc:
Finish at least 10 pages in present scrapbook project.
This week I learned the new Windows 8.0 and 8.1 on my new laptop.  In some ways quite different but still the same as Windows 7.  I had been using Windows Vista on my desktop.  I am still learning it but, at least I feel more comfortable with it now.  

So there you have it.  What I did all last week - plus re-cooperating from the long trip.  I did accomplish quite a lot and feel good about that.  Now to pursue the goals for this week.  Too much?  We will see.

Do you think you will check FlyLady out?  How do you tackle your weeks and "to do lists"?  What are your plans for the week?


You can follow me through BloglovinGoogle+Facebook
and
Leave me a comment - I love to hear from each and every one of you.

Until next time
have fun creating something you love....


I will be linking up to the following linky parties.  Try to visit them and check out all the great creative 
projects found there.

Wednesday, January 8, 2014

New Years Goals

Written by Cathy Carroll for Vintage, Paint and more... 
It is so hard for me to believe it is January 8 already.
We have been traveling throughout this holiday
and
are finally home.
But, as always happens time did not stand still here
and
there is so much to do.
We were in the Midwest this past couple weeks
and
while we were there for this

we were able to leave before the big snows hit
and
the sub zero temperatures.
Albeit, we did have single digit temps here at the beach.
Unusual but, not unheard of.
So, I have been hibernating as I really don't care for anything
below about 60 degrees.

 My Christmas tree is still up and most of my decorations
but,
instead of worrying about them
I decided to sit down and think about the coming year.

I am not a person who is able to set resolutions
and keep them. 
In fact, I hate resolutions.
Instead - I set goals for myself.
But, I do it differently than most people do.
I set my goals by month, week and day.


I am also a person that is still caught in the pre- tech days
and
love to write everything down with pen and paper.
I love to make lists just so I can cross off each item
as I finish it.
This act gives me such a feeling of accomplishment - to look at
a list with lots of cross offs.
So, I have been making lists and scheduling the items in my planner.


I actually make several lists with goals for the year.
They are divided into categories:
personal goals
house goals
blog goals
and
misc. goals.

I then take each goal and assign it to a month - I usually only do 3 months at a time.
If I try to do the whole year and I get behind it frustrates me.

For example - I am in the process of redoing our kitchen.
I actually started this before Thanksgiving.
I still have several projects to finish for it, along with the reorganization of some
of the areas.
So, for January I have made the kitchen my house goal.
I then took each thing that had to be done to finish it
and
assigned it a day in January to do.
That way I should be done by the end of January and be able to
show the big reveal of our newly redecorated kitchen.
I follow this same procedure with all my goals.

My January  goals are as follows:
House - finish all projects and organization of the kitchen
Personal - start a healthy eating program ( you will hear more about that later)
and a walking program
Blog - actually set up a posting schedule along with social media scheduling
and
Misc - finish my oldest granddaughters scrapbook.

Stick with me as I take you through all the projects I have planned for our
"new" kitchen
and
begin my new healthy lifestyle changes.
I think you will find something enjoyable and fun to try.

You can follow me through Bloglovin, Google+, Facebook
and
Leave me a comment - I love to hear from each and every one of you.

Until next time
have fun creating something you love....


Click here to see the parties I am linking to this week.
Please visit them and see all the great projects and inspiration found there....


.