and
constantly on the look out for uses for old books.
When I was putting my new Communication Center together
I needed something to put all those
appointment cards, business cards, stray phone numbers and coupons in.
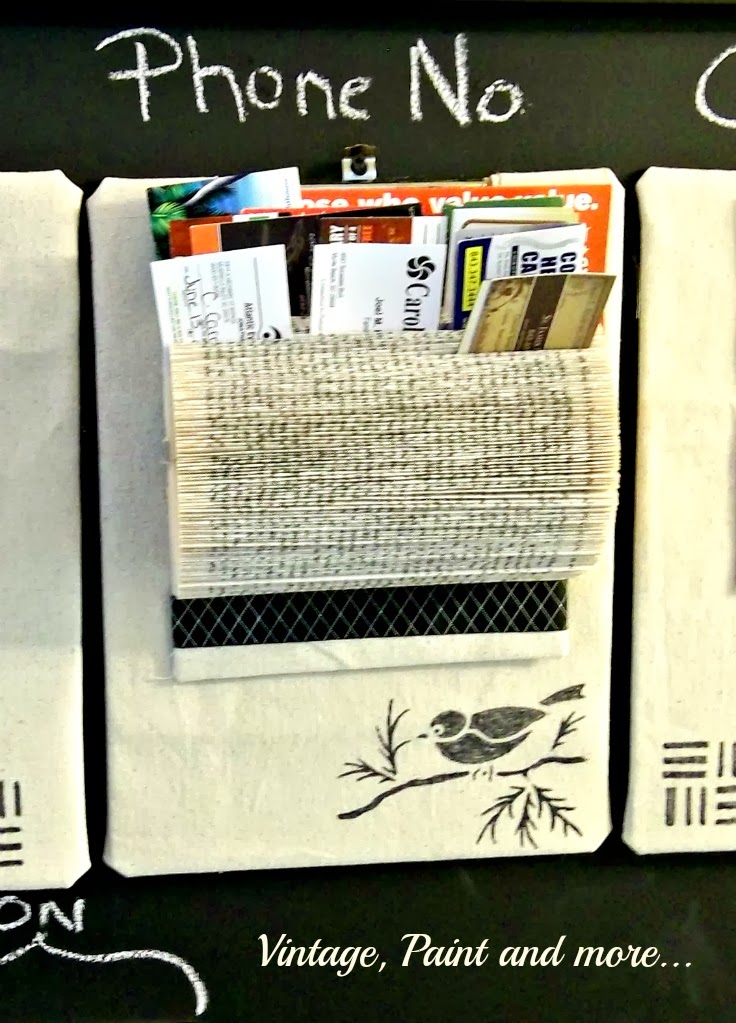
I decided to use an old book re purposed for such a task.
This is what I came up with.
I used an old paper back novel and folded the pages so they were tight.
Then I embellished it and hung it on a clip board to hold all those loose pieces.
I decided I liked it so well that I made one for my desk also.
I love them - but then, they are old altered books.
They are so simple to make and you can have one done in just about an hour
You will need:
an old paper back novel with at least 300 pages
a glue gun and glue sticks
fabric or scrap paper for embellishing
decorative pieces to embellish with
such as buttons, clips, ribbons what ever you desire.
To start you will need a paper back book in fairly good shape.
I like to choose those that have some yellowing or aging along the edges.
This adds to the vintage look I desire.
You really can't see it in this picture but, there is a faint yellowing all along the edges.
Start folding the pages in half length wise.
The above picture shows you how.
You will want to do this for every page.
A boring job but, quite simple.
When you are finished it will look like this- a large column
in the cover of the book.
Next I used a piece of chip board that measured 5x7 and glued it to the back of the book.
This really stabilized it and kept it flatter against the surface it was on.
Next I cut a piece of (you guessed it) drop cloth fabric
and place it between the cover and the column.
I covered it by first turning each corner up as above and gluing it
then
I turned the end flap up and glued it.
Lastly, I did each side.
I covered both flaps and then embellished them.
On this one that sits on my desk
I used a lace applique and old button.
I ran a little bit of lace edging along each side of the column.
To keep it from interfering with the accordion part of the column
I glued it on the first and last page of the column.
This holds it tight but not so tight you cannot use the pages to hold cards.
For the one on the clipboard I just ran a piece of ribbon along the edge and glued it to the back.
I then clipped the other edge under the clip of the board.
Aren't they great.
You can fill these with so many things that need to be organized.
I love both of them
and
they are in heavy use already.
Think you might make one to help organize in your home?
Tell us in the comments where you would use yours.
and
Leave me a comment - I love to hear from each and every one of you.
Until next time
have fun creating something you love....
Click here to see the parties I am linking to this week.
Please visit them and see all the great projects and inspiration found there....


+paper+back+book+for+book+page+art.jpg)


+book+page+business+card+holder.jpg)

What a cute idea!
ReplyDeleteNot only is it brilliant and decorative but functional! Thank you for sharing this idea!
ReplyDeleteOh, how simple and elegant! I really like that idea. Thanks for linking it up to Snickerdoodle Sunday.
ReplyDeletesO CUTE AND CREATIVE! i LOVE IT!!!!!
ReplyDeletePATTI
Oh wow what a creative idea! NICE!
ReplyDeleteOh my word, how clever is this. I love it. Thanks tons for linking to Inspire Me. Hugs, Marty
ReplyDeleteThis is a cute idea. I used to have one that way made into the design of an angel & it was destroyed during a move.
ReplyDeleteHow on earth did you come up with that? Very creative! Thanks for linking up to the Bloggers Brags Pinterest Party. I have pinned your post to the Bloggers Brags Pinterest Board.
ReplyDeleteSo clever, and great looking! Stopping by via TTF, and glad I did :) Blessings, Diana
ReplyDeleteWhat a fun project! Thank you for sharing at TTF this week. Have a great weekend!
ReplyDeleteI really love this idea. I need to do this! Thank you for sharing at What We Accomplished Wednesdays. Have a lovely weekend! ~Deborah
ReplyDeleteCathy, they both turned out so cute! I had seen this idea a while back on Jeanette's blog. Creating a Life Now. I have been wanting to make one. I appreciate that you gave instructions! Thanks for sharing with SYC.
ReplyDeletehugs,
Jann
Love your crafted organizing ideas and this one is my favorite! What a great looking organizer. I thought of the monthly bills when I saw it, but it does have so many decorating and organizing options. Thank you for sharing this! LOVE it! :)
ReplyDeleteRobin