Last month I participated in a DIY Wall Art Blog Hop with 15 other bloggers. We had so much fun with this that we decided to do it again this month but with a bit of a spin on it. This month's challenge was to use one of the other blogger's projects as inspiration and create a new piece of wall art from that inspiration. Thus the DIY Wall Art Flip was born.
I love challenges and decided to make my wall art from the inspiration I got when seeing Danielle's of Old House to New Home painted canvas she did. I made mine to go in my grand daughter's dorm room so this is also part of my series on DIY Dorm Decor.
I used the colors we used in the rest of her decor and you can find more of what we made here. (I apologize for the quality of the pictures but I was painting this at night.)
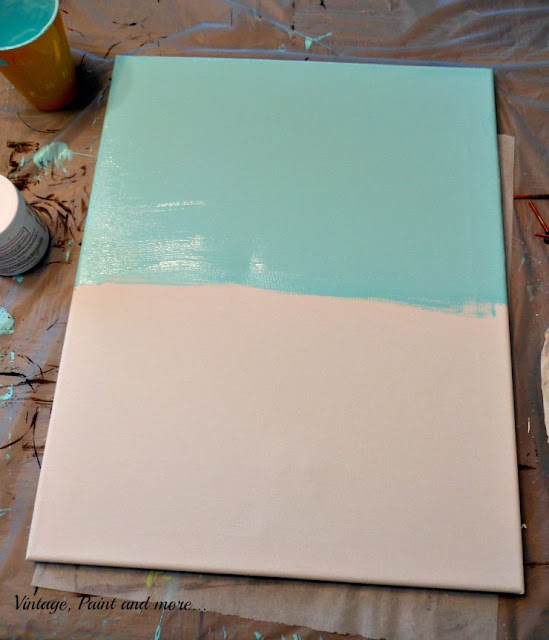
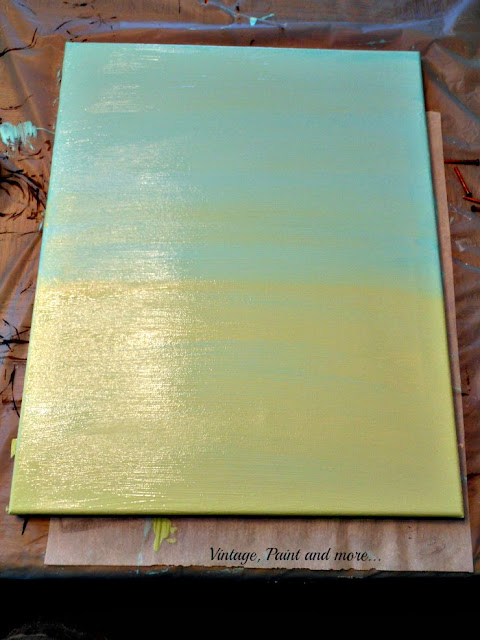
For the bottom half of the canvas I did the same thing. After it was fully covered I took the same brush with the lime green and just started putting some light strokes of the paint into the blue area. You want to do this while it is still wet so it will blend nicely. I then took the turquoise brush and put a few strokes into the green painted area. This was to make sure there was no definitive line between the two colors.
I then wanted to add a bit more to this canvas since it was for a young ladies dorm room.
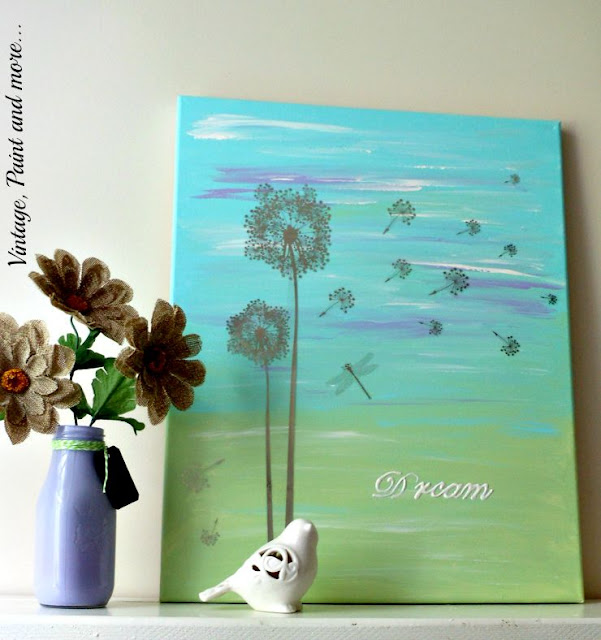
I had picked up this Wall Creations Transfer at the Dollar Tree quite sometime ago thinking it would look cool on something. It is actually a silver metallic sticker type transfer but I thought it would look great on this canvas.
I think it looks awesome. I simply placed it on the canvas and rubbed it down with a credit card (fancy tool). Then I wrote the word DREAM in the small space at the bottom with puffy white paint. I think it turned out quite perfect for a dorm room and she loves it.
Be sure and visit all these blogs and check out their great wall art.
1. Vintage, Paint and More ... // 2. Uncookie Cutter // 3. Our house now a home // 4. Refashionably Late // 5.Casa Watkins // 6. The House Down the Lane // 7. Shabby Grace Blog
I will be linking up to the parties listed on Where I Party Page. Please be sure and visit them. You'll find lots of inspiration and creativity at each one.


I love it Kathy! How cool that you're making all this for your granddaughter's dorm room. Lucky girl!!
ReplyDeleteThank you Sara - I had such a great time making it for her.
DeleteIt looks wonderful! What a fun project, I might have to try this one. I loved the orginial and your spin with the dandelions is great.
ReplyDeleteThank you so much April - I loved the original also I thought Danielle made an awesome piece of wall art. Loved her colors also.
DeleteThis is so pretty! I love the colors you used!
ReplyDeleteThank you Emily - these are the colors my grand daughter is using in her dorm room so I decided to just incorporate them in a canvas painting.
DeleteThis comment has been removed by the author.
ReplyDeleteHi, Kathy ~ I think your granddaughter will love this! The background colors are just gorgeous! My daughter heads back to school in a week and a half. Maybe I'll try to whip one up for her. :0) Have a fabulous week!
ReplyDeleteCathy ~ I'm so sorry for spelling your name with a "K!" I think I'm going to grab myself another cup of coffee...or go take a nap.... :0) Have a great day!
DeleteTiffany, no biggie on the spelling it's still the same name, lol. Would love to see what you come up with your painting should you do one. I think that is part of the fun - seeing how others interpret something in their own way.
DeleteCathy this really came out just beautiful... I can see why your grandaughter loves it! She is one lucky girl to have such a sweet and talented Grandma!!!
ReplyDeleteThanks so much Tammy - and thank you for your sweet comments.
DeleteI love what you did with your piece of wall art! I also love how you added your touch by adding the transfer to the art! Great job!
ReplyDeleteThank you. I had the transfer for a different project but then thought this may be the perfect way to use it. I love how it turned out also. Sometimes things just surprise you, lol....
DeleteIt turned out so pretty, Cathy! Love it.
ReplyDeleteThanks ever so much Heidi - I'm glad you like it.
DeleteThat turned out beautifully! I bet your grand daughter is going to love it for her dorm!
ReplyDeleteThank you Erin - she has it hung up in her room already - I am thrilled she liked it.
DeleteLove this! What a great job! I love the green color :) What a fun idea for dorm decor!
ReplyDeleteHi Meg, that color is called Kiwi Lime - a perfect green to off set the turquoise. I love the this combo and have used it in a room I put together for the grands. I had a blast making dorm decor this year - such a fun project.
DeleteLOVE THIS CATHY!!! I adore the color combination. The turquoise and green is perfect. This would be an excellent addition to any dorm room. The wall stickers addition was a great twist.
ReplyDeleteThis is great! I am making something similar for my parents for Christmas. Love love love!
ReplyDeleteI LOVE this! I come from a family of artists, but I'm stuck with no talent. This is something I think I can do! Thank you so much for sharing! :)
ReplyDeleteSo pretty Cathy! I keep thinking that I would like to do something like this but I'm sure it wouldn't turn out as well!
ReplyDeleteThanks for sharing at Something to Talk About!
Karen
I love the idea of your DIY Wall Art Blog Hop! You put such a fantastic spin to the art from Old House to New Home! I like how you described the process in detail too because not all bloggers take the time to show it. Thank you for linking up to Welcome Home Wednesday. I hope to see more of your decor next week!
ReplyDeleteSuch a fun idea and I love how you incorporated all of Danielle's ideas! I'm sure your granddaughter loves the dandelion... I think that's my favorite part! Thanks for linking up at the Welcome Home Wednesday Link Party! Can't wait to see what you link up next week!
ReplyDeleteWhat a beautiful job on this art work, thanks for sharing this on Dream Create and Inspire.
ReplyDeleteMaria
So pretty!
ReplyDeleteOh it's just perfect Cathy. I love the simplistic beauty of it! Thanks for sharing with SYC.
ReplyDeletehugs,
Jann