What a difference a couple of days can make - Monday we were having beautiful warm, sunny, 70* weather and today it's raining and absolutely freezing - the temp was 32* this morning. No wonder our family has the sniffles. And, I saw snow is falling in some of our most southern states - so crazy. But, at least it looks and feels like Christmas now.
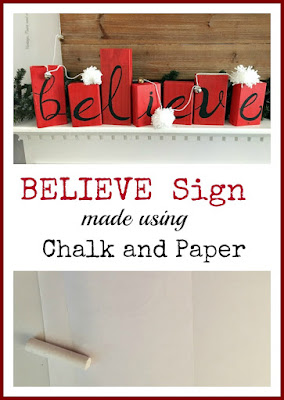
Also, on Monday I shared our Rustic Christmas Mantel with you and promised I would give you the tutorial on how to create the rustic wood BELIEVE sign that is sitting on it. This is a fairly easy project that can be done in one afternoon as long as you plan ahead for the drying of paint.
I love how this sign adds so much personality to our rustic mantel. And, how it looks with that cute little yarn snowball garland draped over it. So, let's get on with the tutorial so you can make your own.
How to Create the Perfect Rustic Wood Sign
Materials you will need:
- scrap 2x4 pieces cut to the size to fit your letters - you will need one block for each letter
- Craft Paint
color of your choice
- Craft paint brushes
- Chalk
- Pen
- Plain white paper
- Black Chalk Paint
or color of choice
- B - 7inches
- E - 5 inches
- L - 9 inches
- I - 5 inches
- E - 5 inches
- V - 6 inches
- E - 5 inches
So, you will need 4 pieces 5 inches long, 1 piece 6 inches long, 1 piece 7 inches long and 1 piece 9 inches long. I made them so the letters would have an undulating top instead of a straight line. Miss A painted all of our pieces with a deep red craft paint we had - you can use the color of your choice. I chose the red to go with the red and black buffalo plaid fabric I have fallen in love with this year and am using a lot of in our Christmas decor.
Next, I covered the back of each piece of paper with chalk. This is done by merely rubbing the side of a stick of chalk over the back and covering it with the chalk residue. This now becomes your tracing paper.
Tape each piece of paper to the corresponding block it belongs to with the chalk side down. Then simply trace over each letter with your ink pen. This will transfer the chalk residue onto the block making a perfect pattern for you to follow to paint.
This is what the block will look like after you are done tracing the letter and the paper is removed. See how the chalk transfers to the block leaving a perfect pattern for you to paint?
Now simply paint in the lines of your pattern with the paint you have chosen to use. I used black chalk paint - continuing with the theme of the buffalo plaid. Any chalk residue on the block will come off easily by wiping it with a wet rag after your paint has dried.
This is the BELIEVE sign when it's all done. Such an easy project to make. I think it adds to the fun of this year's mantel. Just think of all the different words you can use to add to your decor. And, it was all done with items I had lying around the house.
What word would you use to make your sign? I love to hear from you so tell me about it in the comments below.
Until next time - have fun creating something you love.
I will be joining the parties found on the Where I Party page. Please be sure to visit them as you will find so much great inspiration and projects at each one.
If you like this post you may also like these:
DIY Farmhouse Christmas Wreath


Cute idea! Merry Christmas.
ReplyDeleteThank you and Merry Christmas.
DeleteThe Believe blocks are so cute. It is a fun idea.
DeleteI am going to attempt to make one of these, as I love how simple it is #happynow@_karendennis
ReplyDeleteThat's great - I hope you love it as much as I do.
DeleteSuch a cute sign! I love it against the larger sign too. Thanks so much for sharing at the #happynowlinkup!
ReplyDeleteThank you, Leslie
Deletethis is delightful! I do believe I need a silver one that spells 'sparkles'!
ReplyDeletethanks for sharing the tutorial - and Happy Pink Saturday!
Oh how cute that sounds - would love to see it.
DeleteSuch a cute idea! I've been wanting to make some block letters but wasn't sure what I wanted them to say or what size to make them. Pinned.
ReplyDeleteThank you - glad this helped.
DeleteGreat tutorial - I really love the 'santa' colors you used on your blocks! Thanks for sharing with Party in Your PJs!
ReplyDeleteThank you,Lynda.
DeleteI've seen the tutorials about using chalk and paper to transfer an outline to a sign before, but the extra steps you've taken (with the different sizes, and making the letters connect) really makes this project stand out. Super great ideas!
ReplyDeleteThank you, Susan - I am so glad this tutorial was helpful for you.
DeleteHow clever and cute is this sign - I love your clear instructions too
ReplyDeleteThank you.
DeleteGreat tutorial & so cute! Thanks for sharing at Vintage Charm!
ReplyDeleteSimple and so pretty! Thanks for sharing at our link party!
ReplyDeleteThank you.
DeletePerfect colour to set of your mantel. These believe blocks are beautiful, but the backdrop steals the show. I love it.
ReplyDeleteLove this wood sign. Thank you for sharing the tutorial!!
ReplyDeleteAnd that deer wreath is also great! I want to try making both of them!
ig viewer