
Good Morning and Happy 2013 everyone.....
This is my first post of the new year.I took a couple of weeks off over the holiday and did a little bit of traveling. But, now I am back and ready to hit it ...
Today I am going to show you a "little" project that the whole family worked on together.

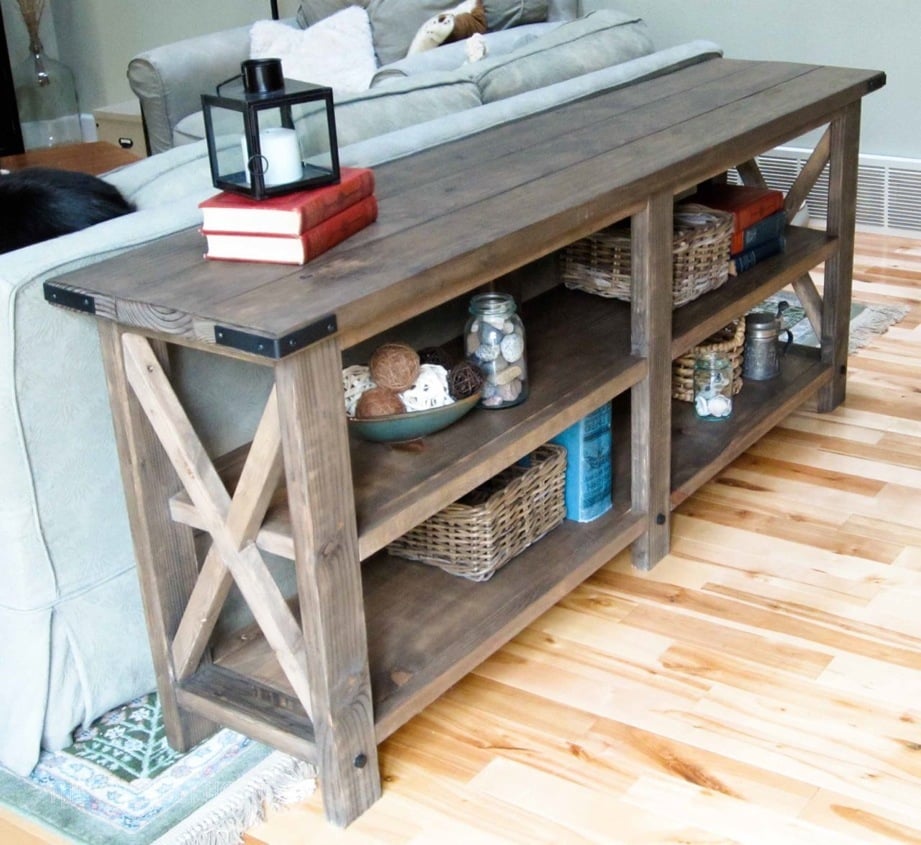
This is a shelf unit we built for our granddaughters. It is actually our version of Ana White's Rustic X Console Table. You can find her plans here.
If you haven't checked out Ana's blog do so. It is amazing what she can do and there is a plethora of plans to drool over. I already have my next project for the family picked out - (just don't tell T yet).

I do not use power tools therefore I do not build furniture but, T says that it was not a difficult project and he had it finished in no time.

Isn't it great - so rustic. You could actually just leave it as it is or stain it at this point.

I love those X's - that's why I picked this table. However, leaving it at this stage was not an option. The girls wanted a worn beachy look for their room.
So, we set to work. I actually forgot to take pics during the process. I get started and it's full steam ahead. I started out with a coat of my homemade grey chalk paint. I cannot tell you the color because I mixed it. I simply put black craft paint in my white paint and mixed until I got the shade I was looking for. Then I put on a coat of white chalk paint - again my homemade version made from Valspar Anthem White.
Then the fun began.I must say this is my first experience at distressing a piece of furniture. I was nervous about how much to do so I am sure I could have done more but kept it not so distressed.

As you can see here the grey peeked through the white just right.


In some areas I took it down to the bare wood. I fell in love with it. Then one coat of Johnson's Min wax. And wallah....

Check out that awesome X. The reason we chose this project.
And best of all the girls love it too. So it was delivered to them and now houses their TV, books, DVD's, CD's - you get the idea. Everything a teen girl needs to store on a shelf unit. Their Mother loves it also - it helps to organize their room as much (as a girl's room can be organized).
I love doing family projects- involving everyone and working together.
Hmmm, let me see - I already have our next one planned out in my head. I just have to sell it to the others......
Does your family do projects together? I would love to hear about them in the comments below. I answer all comments with email.
Until next time - have fun creating something you love.
Hugs,

Charming shelf that you guys made...would love to have you share it at my party on Monday.
ReplyDeleteBlessings,
Linda
Good Morning Cathy, How fabulous to make your own shelves...somehow that word does not seem appropriate as it is more of a book case and is lovely. I found you via Debbie's Newbie Party and have become your newest follower. I am looking forward to your next project. Best Wishes from England, Daphne
ReplyDeleteGreat shelf and I do love the X on the ends also. We just recently, like the other day built a couple of shelf units, looking at your makes me wish that we'd put the X's on the ends too.
ReplyDeleteI found you via Debbie's Newbie Party and am now your newest follower. I hope you'll come by for a visit to my blog too when you get a chance.
Love this shelf...great job! would love it if you came by and share it at http://www.onemoretimeevents.com/2013/01/the-best-of-2012-features.html
ReplyDeleteWow Cathy - that is soooo impressive - I just love it!
ReplyDelete( and the X's are awesome )
XXX
Hi Cathy, I'm visiting from Debbiedoo's. What an awesome project! I've been inspired by Ana White also, but have yet to do a piece of my own. Thanks for sharing it!
ReplyDeleteJeanette @ creating a life
Hi Cathy,
ReplyDeleteWow, it's so wonderful that family builds somthing together:)
And the finished project is charming!!
Love that cottage feel and I like the way you distressed the shelf!
Wow!! you guys are so talented!! I love that you had your son and Roger working together!! Priceless!! I agree with you love the X on the sides! Came out beautiful!!!! love Theresa
ReplyDeleteLOve this piece...I want one too!!!
ReplyDeleteTHanks for linking up to the favorite furniture makeovers of 2012!
Stacey of Embracing Change
Thank you Stacy, my part was quite easy but, the rest of the family said it wasn't a difficult job for them. Thank you for stopping by...
DeleteDo you have all the measurements and dimension's for this table
DeleteAwesome job you did. Thanks for sharing!
ReplyDeleteThanks Debbie for stopping by and commenting...
DeleteYour family project is totally awesome!
ReplyDeleteThanks Sharon, we enjoyed doing it very much...
DeleteHi, It turned out awesome. I, too love the X on the sides...Connie
ReplyDeleteI think the X is what makes it. Thanks for stopping by.....
DeleteCathy this turned out so cute and you did a wonderful job with the paint and distressing. I think all of my projects are a family affair. I always need my husbands help at some point in a project. Hugs, Peggy
ReplyDeleteHi, Just stopping by and letting you know you were featured over at One More Time Events. Share it one more Time #2 linky party is open hope you can join us.http://www.onemoretimeevents.com/2013/01/share-it-one-more-time-linky-party-and.html
ReplyDeleteGreat mods on this project! Thanks for sharing!
ReplyDelete