This post contains affiliate links.
Recently I shared the makeover of my dining room with you. The biggest part of that makeover was the upcycling of our table and chairs instead of getting new ones. This saved us a lot of money being able to update this set and still use it, as it is in great shape and has good bones. So I was glad I could make it work in this room. Today I am going to show you how I upholstered the chair seats to bring this set together and make it look as though it had been sold this way.
As you can see these chairs had wood seats and no upholstery before. You can see the table in the background and how they really didn't go together anymore. So I went on a search for some fabric to pull the pieces together and make them look like a set. I found a fabric I fell in love with and got 3 of the chairs upholstered but, then when we put everything together the fabric didn't really do much for the set. The back ground was white and it just made the table and chairs look like two sets put together. So back to the drawing board. I finally found this fabric that I used. (However, the pictures were taken with the first fabric so they will look a little different.)
The first step was to remove all the seats. This was hubby's task - a fairly easy one as each one was held on with 4 screws - quick to remove.
Since these are wood seats I wanted to make them a little more comfortable. So the first thing I did was cut out a piece of 1/4" foam to place on each seat. I didn't secure this with glue or anything because the next step was wrapping the seat with quilt batting.
I cut the quilt batting about 4 inches wider than the seat on all sides so it could wrap around the foam and seat and still be secured easily with staples.
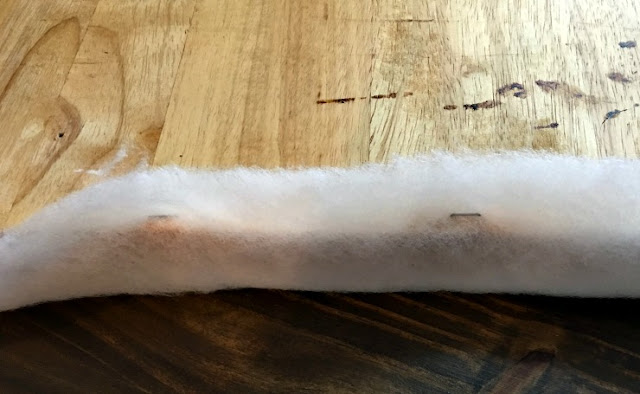
Then I began stapling the seat close to the edge. I didn't want a large bulky piece for the fabric to go over. I started by stapling the two sides first then the ends - leaving the corners till last. I have a step by step for the corners below with the fabric application.
Then I staple the sides - leaving the corners for last. By folding the fabric you can see it makes a nice neat underside - not that anyone will be checking it out.
Now for the corners. Pull the corner of the fabric straight up into the chair as shown. You can actually cut that point off if it's too long. This fabric was not too bulky so I was able to fold that point in and staple it.
You can see here that the point was folded in and then stapled.
Next, you simply take one of the points made and pull it up over the chair tautly.
Now you place a staple in this area. You may need to place two or three staples in each of these folded over points. And that's it - after you've done this for each corner - you're done.
Just put your seat back on your chair - hubby needed a job to do. And you're all finished. Of course, I had five more chairs to do but it only took me an afternoon to finish them all. And that was with having to remove fabric from the three I had already finished.
Such an easy project that makes a very big difference. It not only pulled this set together it also made a very pretty vintage modern dining room set. I am loving the new look so much more than what it was before. If you want to see the before you can check it out here.
I will be linking up to the parties listed on the Where I Party. Please be sure to stop by and see all the great projects and inspiration found at each one.
If you liked this post you may also like these:
Vintage Nightstands
How to Stencil a Plate
Painted Pillows


Cathy, your reupholstered chairs add so much to the room! Thanks for sharing @ Vintage Charm!
ReplyDeleteThank you
DeleteI am loving the fabric you picked, it turned out great!
ReplyDeleteThank you, Christine.
DeleteThank you for posting this. I have been wanting to do this forever, but didn't know how to go about it. Sure hope it will work for me. Chair cushions cost a fortune!
ReplyDeleteThe chair is now very elegant and very comfortable I suppose! I think it needed it! Thank you for sharing at Sweet Inspiration Link Party
ReplyDeletewww.artdecorationcrafting.gr
Great job Cathy. They look lovely!! Thanks for sharing with SYC.
ReplyDeletehugs,
Jann
Your chairs look great! Upholstering them was a beautiful way to update them. Thanks for sharing at Brag About It. We're featuring them at tomorrow's party.
ReplyDelete